Today is the big day! Our powder room refresh is completely done and ready for the reveal! I can’t wait to show you our new and improved space.
If you are new here, my husband and I moved into our (cookie cutter) home a little over a year ago and have been working on making it feel more like Us and like Home. Our most recent project has been refreshing our powder room off of the entryway.
I’ve been mulling over what to do with our main guest bathroom since we moved in. First we tried to just hang different fixtures and add some (much too small) shelves to spruce it up. Then I toyed around with the idea of a dark floral wall paper (ended up not going with the rest of our home and I’ve decided it would be adorable in a boutique or cafe of some sort if you’re an owner of one and are needing ideas😉) but in the end going with faux shiplap on one wall, while also creating a fun pop of color to the inside door, was the winner!
Faux shiplap seems to be all the rage these days – I think we can all thank Fixer Upper Joanna Gaines for that!😍
Not only does it add fabulous style to any space in your home, it’s actually quite easy to install. If you have seen any of my pervious posts, we installed tongue-and-groove shiplap on our fireplace wall and I have to say faux shiplap was much easier and MUCH cheaper!
So lets dive step by step into how we refreshed our powder room!
Here’s what our powder room looked like pretty much when we moved in just with an uglier mirror and toilet paper roll (if you can imagine it worse than this😂).

H O W T O I N S T A L L D I Y F A U X S H I P L A P
Materials Needed:
- 4×8 sheets of 23/32 plywood (we went with thinner sheets only because our toilet is so close to the wall and we wanted to be able to fit the back of the toilet back on, so make sure to measure that gap from your toilet to the wall!)
- Caulking
- 1-1/2″ 18G Brad Nails
- Behr paint and primer
- Spackle (if you want to fill in nail holes)
Tools Needed:
- 20-Volt Max Lithium-Ion 18-Gauge Cordless Brad Nailer
- Compound miter saw
- Roller brush
- Paint brush
- Levler
- 2-3 Nickels (for spacing the gap)
- Chisel
- Stud finder
- Measuring tape
- Putty Knife (again if you want to fill in nail holes)
C O M M O N Q U E S T I O N S?
Do you paint the wall before you install shiplap?
If you are doing nickel gap and not tongue-and-groove, yes I would paint the wall before-hand the same color you are painting your shiplap. Even though it is a small gap, you would hate to get your beautiful white shiplap wall up, you step back, and you see the remnants of a bright red wall behind it. Yikes.
Do you start from the top or the bottom?
We have started from the top with both of our shiplap projects. This way you have a straight line to begin with and since you are likely installing floor trim, having a full board at the bottom isn’t as visually important as having a full board at the top.
Do you paint the shiplap before or after you put it up on the wall?
We recommend both actually!
We painted these boards completely before we put them up, it was much easier getting the edges and seems this way. After it was all done I went back over it with a second coat!
With the tongue-and-groove we did on our fireplace, we waited to paint until it was all up. I wasn’t as worried about filling the gaps with these boards. I also did a white wash rather than a full coat, I didn’t want it too look perfect.
For a bathroom do I need to remove the sink and toilet?
We did pull our sink out from the wall, it was very simple, turn the water off, cut the sealant, remove bolts from the back of the sink, at this point it came away from the wall. (we didn’t wanted the added hassle of cutting around the sink, we wanted a clean line going all the way across the wall)
As for the toilet we simply took off just the tank, this was helpful with painting and gave us a little more room to work with when installing the boards. If you need a simple video on how to do that, we used this one – How to Remove a Toilet Tank
I N S T R U C T I O N S F O R I N S T A L L I N G S H I P L A P
Step 1: Prep and Cutting
Measure the square footage of the space you intend to shiplap. You want to multiply the width of the wall by its height to get your square footage. Then you are ready to get your wood!
We went to Home Depot for our underlayment plywood. Home Depot will rip the boards for you for free! Saves a lot of time. I have heard horror stories of people getting their boards ripped from Home Depot and they aren’t the right size, we had them cut just an inch longer than we needed so we could get the perfect size ourselves. Also keep in mind that not every board will be exactly the same length! Walls aren’t perfectly straight so measure before every cut!

4×8 underlayment plywood

Ripped into 4.5″x62″
Step 2: Paint, and Mark Studs
We started by painting the wall that the shiplap will go on and also painted the boards, if you choose to do this as well!

Use your trusty stud finder and sharpie to mark where you will be nailing your boards to the wall. If you do not nail every piece directly into a stud, it’s not the end of the world, these boards are not heavy and will be fine nailing directly into the drywall.

Step 3: Time to Install!
We started at the top of the wall. Measure every single time before you cut! every time. It may seem like you should just be able to measure once and cut all the boards down the wall the same but believe me, take the time to measure every time. Each of our cuts were up to a 16th on an inch off from the last.
Once you have your first board cut, press it hard against the top of the ceiling, level it, then nail away!
Continue this the rest of the way down your wall with the added step of putting 2-3 nickel spacing between each board. We made sure the board was level before we nailed every time. Taking your time to measure properly and to level each board will save you a headache later on.
Getting around tricky spots like plug in’s and piping we used a chisel. We measured and drew on the board the parts we needed to cut out, took it to the garage, used a chisel and hammer and out the pieces came! simple as that. We have used a jig saw before for outlets but since this was a smaller project this seemed easiest and was very quick!

Step 4: Finishing Touches
Since our powder room is so small and the shiplap happened to line up perfectly on the bottom we did not have the need for any molding or trim.
Also some people add spackle to the nail holes and paint over them, call us weird, but we like the look of them slightly being visible, so we did not spackle over the holes.
Once all the shiplap was up I did one more coat of paint, put the sink and toilet back together and she was finished!

Ta-Dah!

F I N I S H I N G T O U C H E S
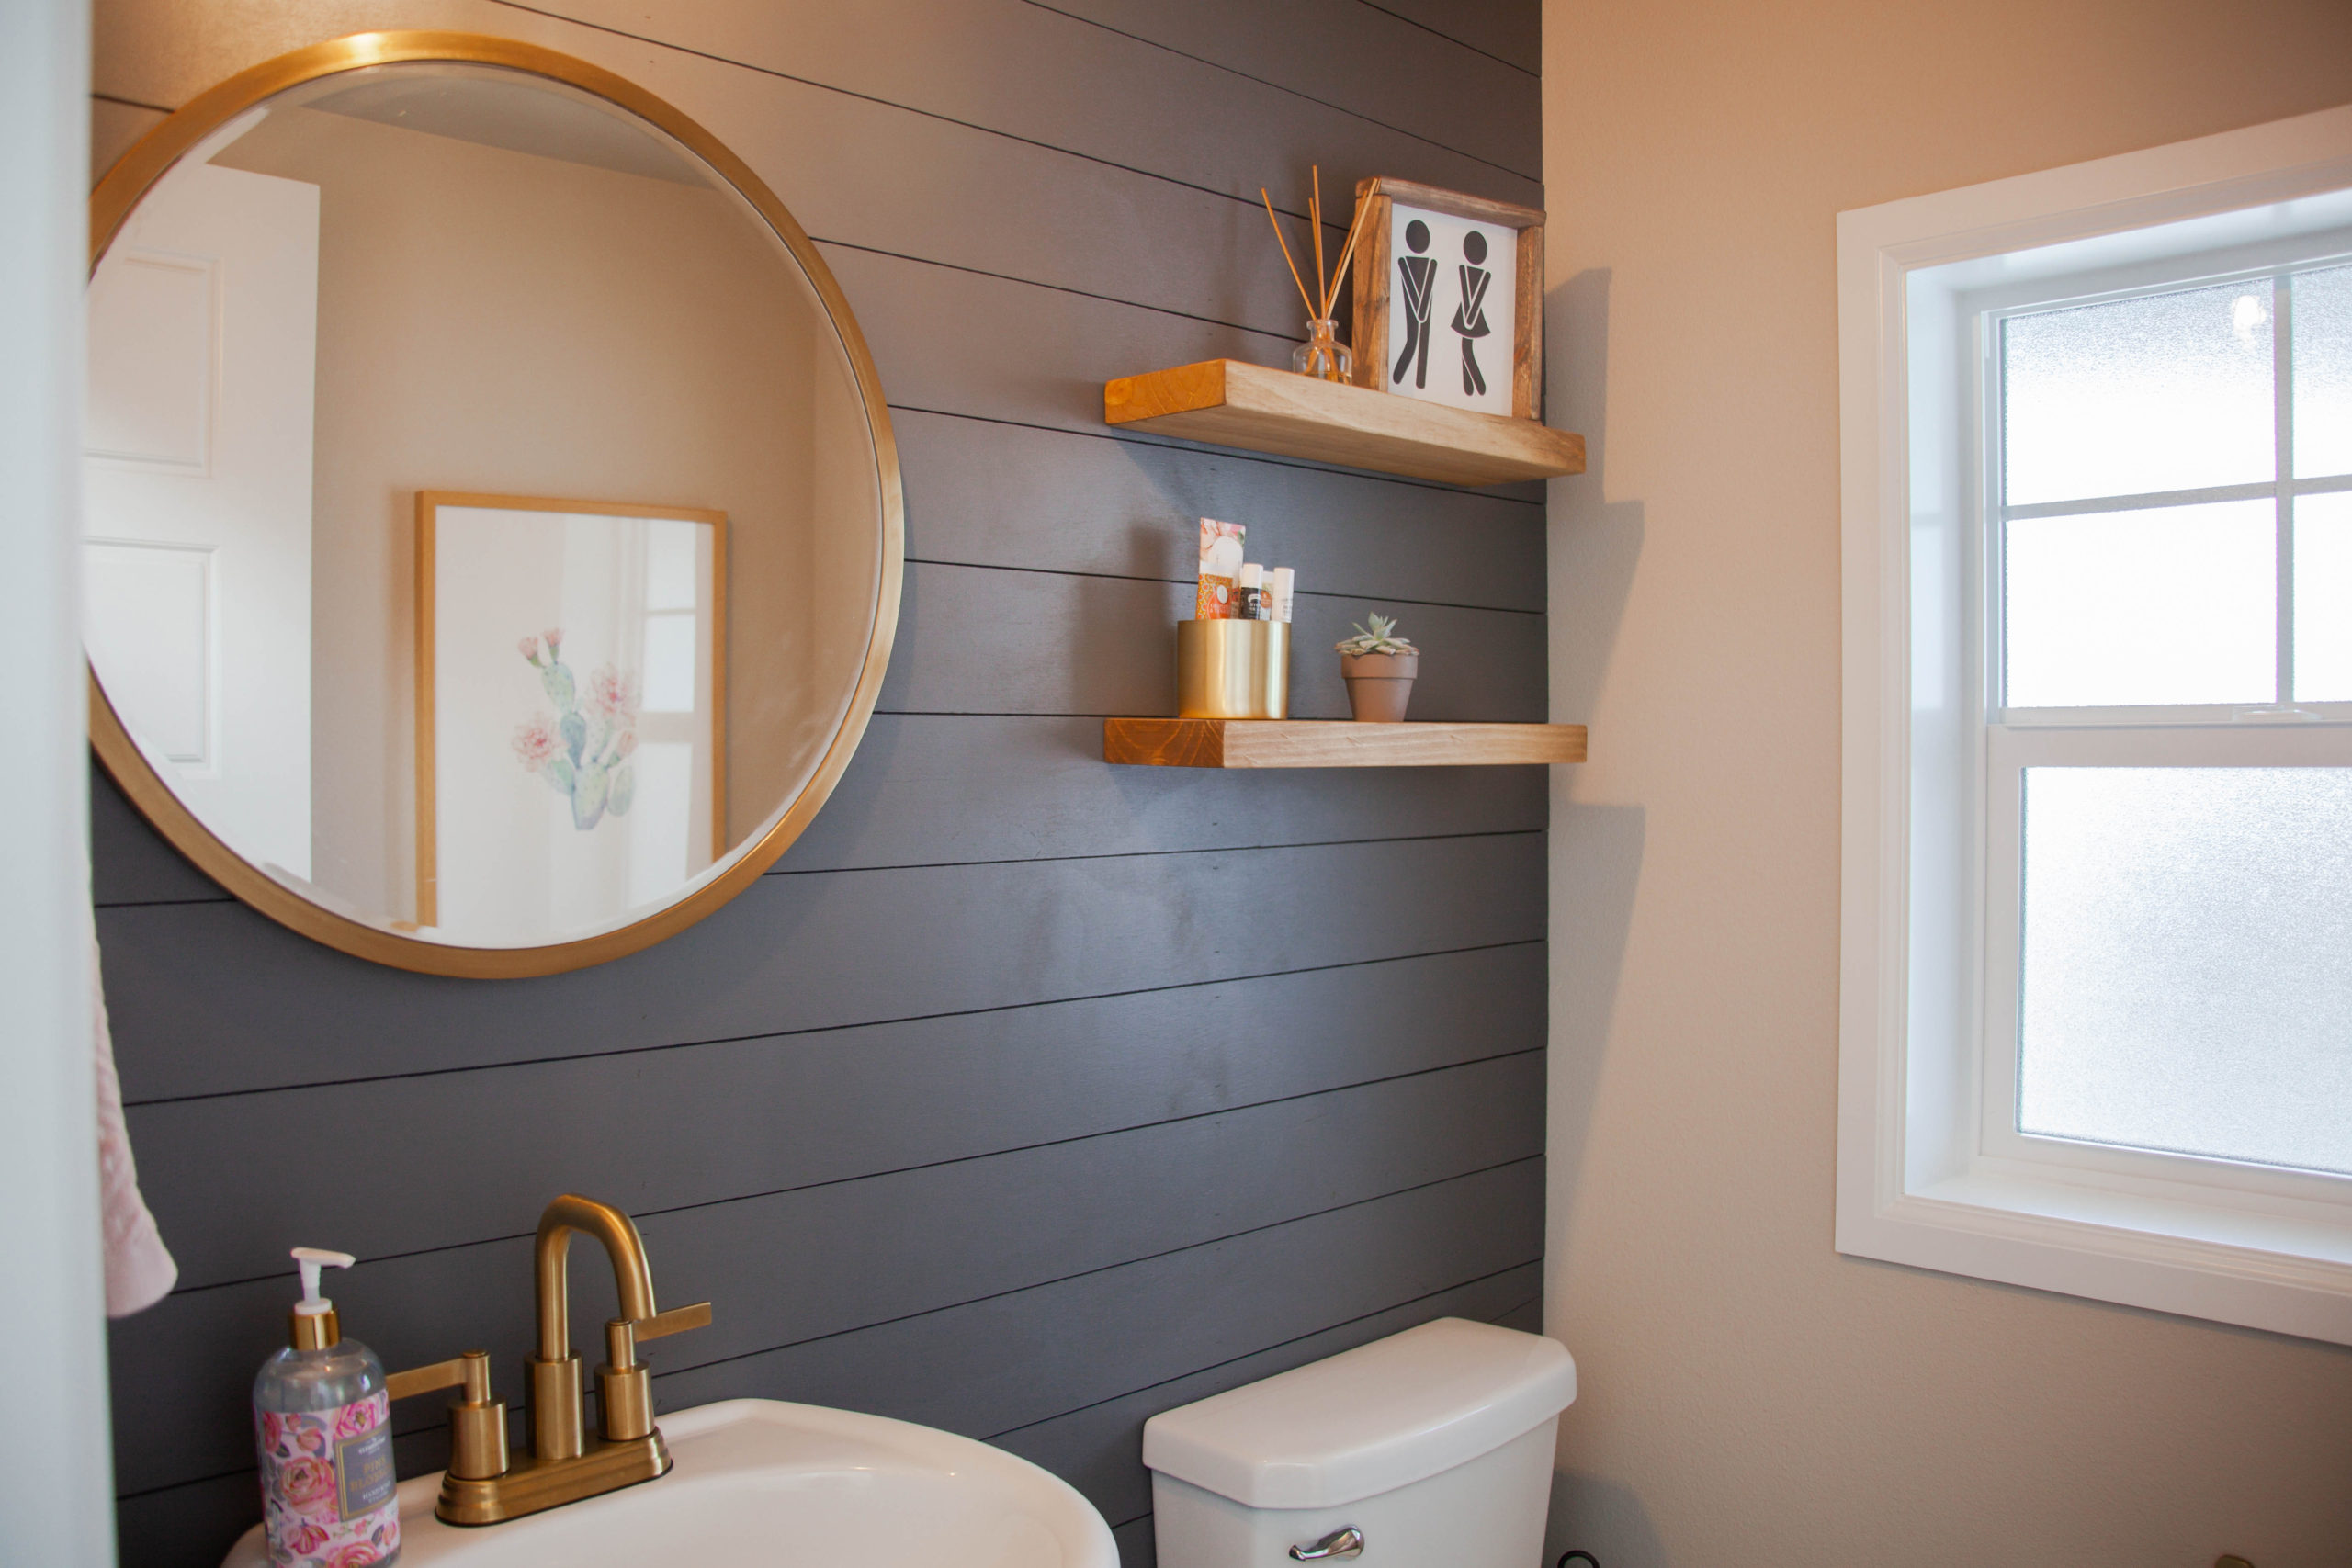
For decor I went with very soft pink touches, along with brass to compliment the dark gray. I chose brass for all the fixtures, a light pink towel, a cacti wall print, some neutral wood shelves and a wood stool to finish off the look! I also went a little crazy and painted the inside of the door a very light pink and I’m obsessed! I love the way it all turned out and would love to hear your feedback along with any suggestions you may have!


Thank you for visiting and I hope this helps you with your upcoming project!
L O V E I T? P I N I T!


