Happy Monday all! I hope everyone has a great week. Today I wanted to share our new bathroom refresh with you all! I am sharing how we did the vertical ship lap, the bead board, and what paint color we chose. I will also link the decor & hardware items we used in the bathroom as well.

This bathroom is SO hard to get pictures of but I cannot get over how this bathroom turned out! I feel like the kids bathroom is a fun place to experiment with a unique and fun design. I had an idea, made a vision board, and my husband helped make it come to life! Being almost 37 weeks pregnant (can’t believe that!) I wanted not only her nursery done but I wanted to update the kids bathroom as well before our baby girl arrives. I am so thankful for this hubby of mine because besides painting and caulking, I wasn’t much help. haha. So keep scrolling for a how-to on our DIY bathroom refresh plus all the links!
V E R T I C A L S H I P L A P
When we first moved in I ordered some art prints for this bathroom and called it good for now. I knew that eventually I wanted that giant mirror to come down and come up with something fun and elegant for the kids/guest bathroom. This entire bathroom idea started because I wanted vertical shiplap on the wall opposite of the mirrors with some towel hooks. From there I decided I hated the big long mirror that comes in these homes so why not take that down too?? Next thing I knew we were changing everything besides ripping out the tub and flooring!
Before

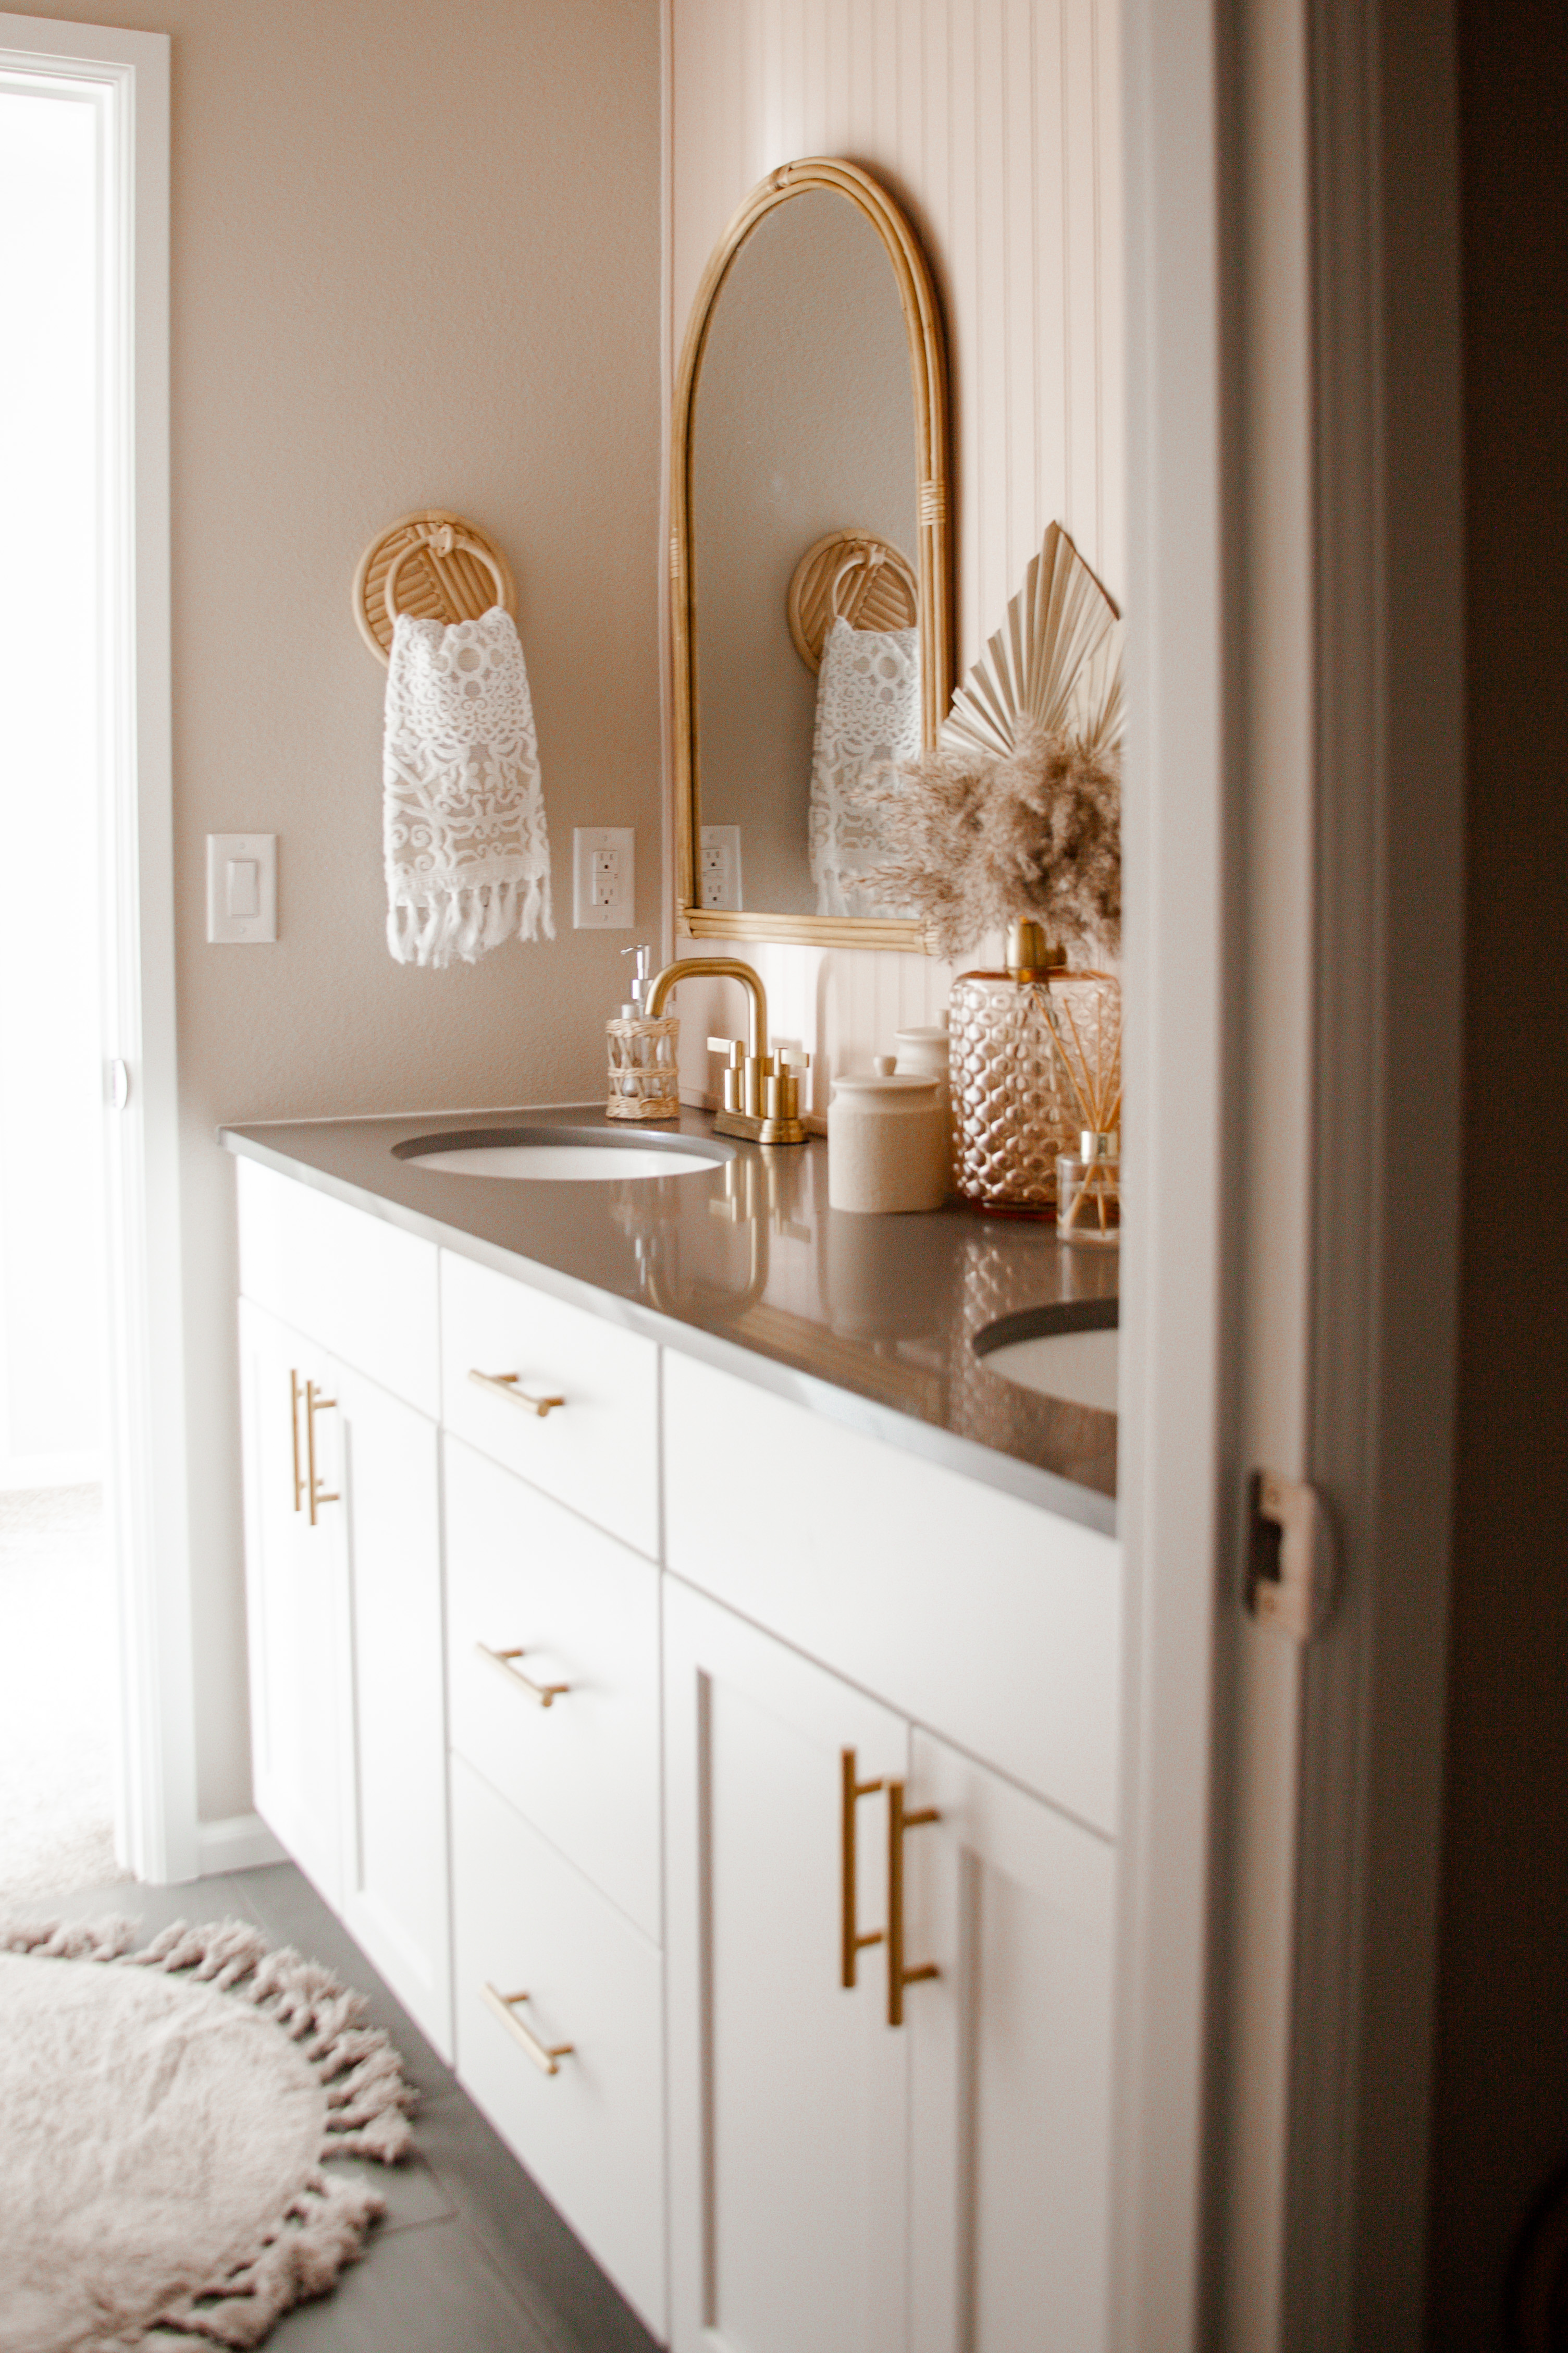
After
Materials
- 10 -White PVC 5×8 boards (these are on the pricier side, we used these for moisture in a bathroom. You could also just use pine boards)
- 2 – 1×2 10ft pine board
- 1 – 10ft 1×6 common board
- miter saw
- liquid nails
- brad nailer
- paint – paint color Setting Plaster by Farrow & Ball (I was able to get this mixed at Home Depot with Behr paint)
- paint brush & roller
- trim (personal choice)
- towel hooks
- tile spacers
- level
- wood filler (optional)
- caulk (optional)
- sanding block
Instructions
- I started by painting the wall behind where the vertical shiplap would go. Just a quick one coat paint, I didn’t want to be able to see the existing paint between the gaps.
- Measure your wall to determine how many boards you will need. We got the 8 ft boards and was able to cut each of them in half to make 4ft boards. Cut all your boards at the beginning for quick installation.
- We did not take our baseboards off, I like the look of keeping our existing boards, so instead we added a 1×2 board above our baseboards. This is the board your vertical shiplap will sit on. In my opinion it just makes everything look flush.

- Now its time to start installing your vertical boards. We started in the center of the wall and worked our way to the ends, this way the ends will match each other if you have to cut them down. We added liquid nails to the back of each board and then used 16g 1.5 inch nails to the top and bottom of each board. We spaced each board using tile spacers and leveled each board before nailing it to the wall.

- Once all the vertical boards were up we added the 1×6 common board to the top, also using liquid nails and nailing it to the wall.

- On top of the 1×6 we added another 1×2 board, turned on its 1 inch side to look like a shelf. This is personal preference. I just think it makes the wall looked finished off.
- At this point most would be finished, it just worked out that we ended up having a gap we didn’t like between the vertical boards and the end of the wall. There wasn’t enough room to slide another vertical board in, so we added some thin trim to finish off this wall!
- Once all the boards are up, before I could paint, I added wood filler to all the nail holes and to any gaps between the vertical boards and the 1×6 board. I let it dry then sanded it all down. I then used caulking where the trim met the wall and where the top shelf met the wall.

- I ended up doing 3 coats of paint (another personal preference on how it looks) I used a foam roller for most of it and a brush for the corners and under the little shelf.

Wish I could get a better picture but it definitely adds so much character to this bathroom! I love it so much! Vertical shiplap would be a great addition to just about any room! Would be perfect for a bedroom, a hallway, and obviously I personally think a bathroom! haha
B E A D B O A R D
First things first on this wall was to remove that huge, obnoxious mirror that comes in all of these Lennar homes. We didn’t have the best luck when doing this in our downstairs powder bath but my husband did it with ease this time! Most mirrors will be heavily glued to the wall so you have to be careful when taking it down. He used rubber shims to hammer behind the mirror and then slowly pry it off. Thankfully he did it slow and we didn’t have anything break!

I knew I wanted to use the same paint color for this wall but also needed to cover up the wall damage. I think the look of bead board is a perfect fit for this kids bathroom. So I chose bead board, also painted it the same Setting Plaster as the vertical shiplap!

Materials
- 2 sheets of bead board
- liquid nails
- 18g brad nailer
- 1.5 inch nails
- thin solid pine molding
- caulking (optional)
- wood filler (optional)
- Setting Plaster paint
- paint roller & brush
Instructions
- Measure your wall and cut bead board accordingly, we just used a table saw for this. You could also have them ripped at Home Depot.
- Wipe down the wall and try to sand down as much as the glue as you can.
- At this point most people can just put glue on the back of the bead board and put it up on the wall. Thats the nice thing about this board, its inexpensive, super light, and easy to put up. We did not have such luck though and ended up having to nail it all to the wall. If glue works for you, I would avoid nailing into the bead board as much as possible.
- We then added the pine moulding to the outside edges of the bead board. Again this was our preference, the wall would look great even without it!
- I added wood filler to all the nail holes and caulk around all the edges where the moulding meets the wall.
- I then added 3 coats of Setting plaster paint and she was done! It was time to add the mirrors, change out the hardware and decorate!

We ended up changing out the faucets to brushed gold, the cabinet hardware to an antique gold, the toilet paper holder and hand towel holder to a rattan. We added rattan mirrors to the bead board and rattan towel hooks to the vertical shiplap! This bathroom came together like a dream. The Setting Plaster color with the brushed gold and rattan accents really adds some fun character to this kids bathroom.
I will link everything from hardware to decor below for you!


I hope this gives you inspiration to create a space that brings you some joy and maybe step out of the box a little! Thanks for stopping by!


