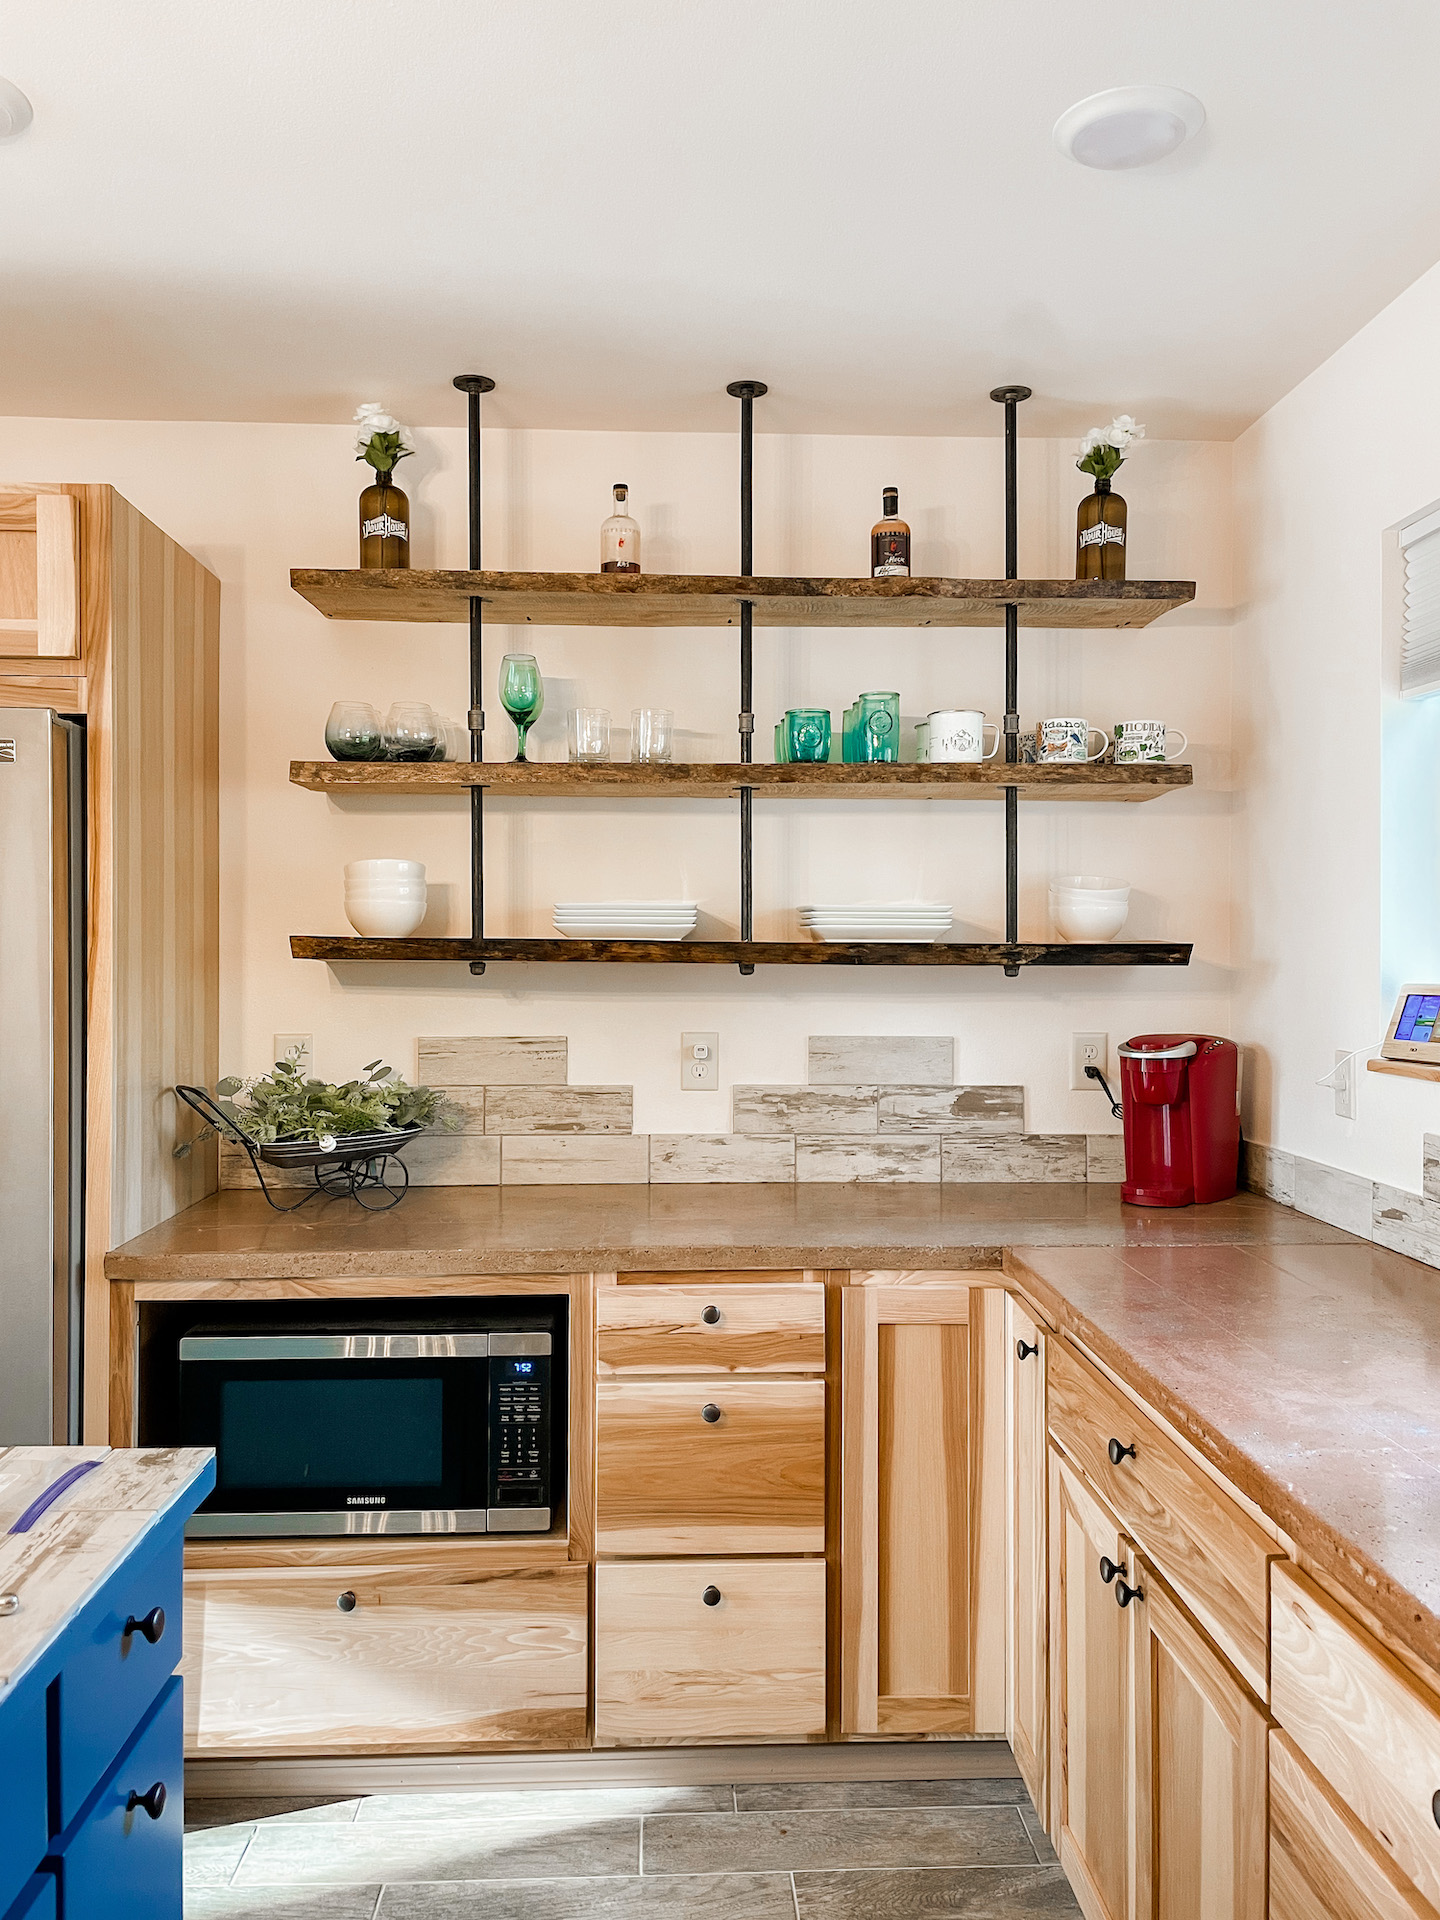
Today is the day friends! I got the low down from my dad on how he made the open kitchen shelves at our family lake cabin. Ill share with you this budget friendly tutorial on how to create beautiful DIY open shelving . Keep reading for the materials used and a step-by-step guide on how you can too!

Yes we did these floating shelves in our cabin but you can incorporate this guide in any home! The goal for this family cabin was for everything to be functional, easy, and as open as can be. My parents built this entire cabin themselves, it was important for them to use items from the local town of Kettle Falls, WA. They wanted to support the local businesses so everything either came from town or from our own property.  With that being said, my dad cut down a 20in round pine tree out back for this project (I know you might be tempted to push the escape button at this point but not so fast!) I know not everyone wants to or can go out and just chop down a tree😂 there are plenty of ways to still make these shelves without owning a chain saw. So stay with me.
D I Y O P E N S H E L V I N G T U T O R I A L
Open shelving is not only great in a kitchen but it can be used in a bathroom, bedroom, or living room! You can do your open shelving with a raw edge like these or completely finished. The options are endless when it comes to open shelving, that’s what is so great! You can make them to fit your style!
M A T E R I A L s
- Stihl chain saw with an Alaska mill attachment on a 24inch bar (or your local hardware store, like Home Depot or a mill outlet, will have the wood you prefer.)
- sander
- threaded iron piping
- pipe caps
- electric drill
- leveler
- 3 inch wood screws
- wall anchors
- stain and sealer
S T E P B Y S T E P
- Measure your space. Whether it is in your kitchen, bedroom, or bathroom measure the length of shelves you will need and the thickness you want. These shelves are 2 1/5″x13″x6 ft in length. If I were doing shelves in my living room I would want them a bit thicker, 4″x10″x68″. Also measure out how many shelves you will be needing.
- If you are cutting the slabs yourself set the mill to 2.5 inch thickness. Each slab took about 15 minutes to cut out. If you are buying boards for this project you will be able to find the right width and thickness but you will probably have to cut to length. For example Home Depot has 2 x 10 x 10 untreated boards that would be perfect for a kitchen. Those are linked here.

3. Cut the raw edge off of the end that will be up against the wall so it will sit flush.
4. Sand boards down to desired smoothness. At this point you can determine how rustic you want them to look.
5. Now time for staining or sealing. Minwax is a great stain brand, they have so many different colors to choose from. If you are leaving them natural I would suggest sealing them. While they are drying you can move onto measuring the ceiling for where your piping will go.
6. Attach 1/2 inch threaded iron piping to ceiling, measuring them evenly apart. These are your supporters. Depending on the length of your shelves will tell how many you will need. They should be spaced evenly through the shelves for weight distribution.
7. Measure and drill 3 – 3/4 inch holes in the slabs for 1/2 in piping. make sure your spacing is matching the spacing in the ceiling so it all can come together. Pipes don’t bend easily. haha
8. Drill pocket holes on the wall side of each slab, lining up with studs in the wall. This will allow the shelves to be attached to the wall for added support.
9. Thread piping through each hole in the shelves and attach to ceiling brackets.
10 . Move each shelf to desired height and attach to wall with your pocket holes you have already drilled. You will use an anchor to attach the shelves to the wall. Level all your shelves, once you have them in place attach your pipe caps to the ends and you are done!


This project can be as big or easy as you want it to be. I will be attaching some other options for wall brackets, and wood below. If you are building these shelves yourself, YOU CAN DO IT! If you don’t have the resources to do all this yourself, YOU CAN ALSO DO IT! There are so many options out there to make this an easy DIY if that is what you are looking for!

untreated wood / everbilt corner bracket / industrial pipe shelf / crates and pallet wood shelving bracket

shelves with brackets / reclaimed wood shelves / industrial piping shelves / industrial floating pipe shelves


